Rearing chicks Indoors at Home in a Brooder
Everything you need to know about rearing chicks indoors in the home using a Brooder, how to regulate temperature using heat lamps or electric hens and how to position your feeders and drinkers to avoid waste and contamination.
Sarah Barratt
3/3/20267 min read
Rearing Chicks in a Brooder
Preparing a Brooder Before the Eggs Hatch
Before your eggs begin hatching, you should already have a brooder set up and running. Chicks cannot regulate their body temperature when they first hatch, so they need an artificial heat source immediately. A brooder can be as simple or as elaborate as you choose, but it must provide four essentials
Safe warmth
Dry bedding
Clean food and water
Protection from drafts and predators
Many keepers use small cages or enclosed brooder boxes during the early weeks. The important thing is that the chicks cannot escape, cannot get chilled by drafts, and cannot crowd into corners where they might pile up and suffocate each other.
Types of Cages for Brooding Chick
There are several cage or enclosure types that work well for newly hatched chicks.
Small Brooder Boxes
A wooden brooder box or plastic storage container is commonly used during the first week. These are easy to clean and allow you to control temperature effectively. However, ventilation must be provided, and the sides must be high enough that chicks cannot jump out as they grow.
Wire Cages
A large hamster cage or indoor guinea pig cage makes a wonderful brooder, and can be kept lovely and warm just by draping a towel over the top to keep the ambient temperature up in general, so that the heat source does not have to struggle to keep the general area warm.
Rabbit Cages
Rabbit cages are extremely practical brooders. They are spacious, easy to clean, and allow feeders and drinkers to be attached to the outside of the cage.
Hamster Cages for Quail Chicks
Quail chicks are extremely small and can escape through surprisingly tiny gaps. For them, a small hamster cage works very well because the bar spacing is fine enough to prevent escape. These cages are also ideal for using a small heat lamp above the cage.
Bedding and Floor Covering
The most common bedding for chick brooders is wood shavings. These absorb moisture and provide insulation from the floor. Avoid very fine dust-like shavings, as these can cause respiratory issues.
During the first day or two, some breeders place paper towel over the bedding so chicks can easily find food scattered on the surface. Paper towels and newspaper can provide a very slippery surface and splay leg can be caused when the chicks cannot grip the surface with their little feet, so for that reason I do not personally recommend using it.
Clean bedding is extremely important. Damp or dirty bedding can quickly lead to illness such as coccidiosis and unpleasant smells.
Heat Sources. Electric Hens vs Heat Lamps
The most critical element in brooding is warmth. Two main systems are commonly used, electric hens and heat lamps.
Electric Hens
Electric hens are heated plates mounted on adjustable legs. Chicken chicks naturally gather underneath the plate just as they would under a broody hen. Quail chicks tend not to as they do not have the benefit of the broody genes due to years of domestication.
Advantages include
Very energy efficient
Low running cost
Reduced fire risk compared to lamps
Chicks regulate their own warmth by moving in and out
Because they only heat the space underneath the plate, they use far less electricity than a lamp heating the entire brooder.
Safety Considerations
Electric hens are generally very safe, but they still become warm. The plate should not be touched unnecessarily, and children should be supervised around them.
The main safety rule is correct height adjustment. The plate should sit just above the chicks so they can comfortably walk underneath while touching the warm surface slightly with their backs.
If the plate is too high, the chicks will not stay warm. If it is too low, they may struggle to move underneath.
Heat Lamps
Heat lamps are another common brooder heat source. These usually use a red bulb, often around 60 to 100 watts in smaller brooders.
The red light has several advantages
It reduces stress among chicks
It discourages pecking and cannibalism
It allows chicks to rest without bright lighting
However, heat lamps must be used carefully. They should always be securely fastened and positioned so they cannot fall onto bedding.
Running Costs
Heat lamps typically cost more to run than electric hens because they heat the entire brooder area rather than a small sheltered space.
For example
A 60W bulb running continuously uses about 1.44 kWh per day.
Over several weeks, this can add noticeably to electricity costs.
Electric hens use significantly less power because they cycle on and off and heat a smaller area.
Why Quail Chicks Often Do Better With Heat Lamps
Interestingly, many breeders find that quail chicks do not use electric hens very well.
This may be because quail rarely go broody in nature. Unlike chickens, quail chicks may not instinctively understand that they should gather underneath a heat plate.
Instead, they tend to cluster directly beneath a heat source such as a lamp.
For this reason, many keepers raise quail chicks in a hamster cage or small brooder with a 60-watt red fire-glow bulb suspended jut above the head height of the quail inside the cage.
This setup provides a warm zone directly under the light where the quail naturally gather.
Feeders and Preventing Waste and Contamination
Young chicks can make a remarkable mess of their feed by dust bathing and generally spreading the crumbs far and wide. Another common problem is bedding being scratched into the feeder.
When shavings cover the feed, chicks waste food and may struggle to eat properly, if no one notices they can even starve to death!
The solution is simple: raise the feeder slightly above the floor or place it on a couple of bricks so that the chicks can hop up onto the brick and reach the edge of the feeder.
Ideally, the feeder should hang from the top of the cage at about chick chest height. This allows the chicks to reach the feed easily but prevents them from scratching bedding into it, or feed out of it.
As the chicks grow, continue raising the feeder so it stays at the correct height.
This simple adjustment saves feed and keeps the brooder cleaner.
Drinkers and How to Avoid Dirty Water
Water hygiene is even more important than feed hygiene.
Many brooders use bell drinkers placed on the floor. While these work well, they often become contaminated very quickly.
Chicks scratch bedding everywhere, and the bell drinker can quickly fill with:
Wood shavings
Feed particles
Droppings
Dirty water can spread disease and must be changed frequently.
Rabbit Water Bottles
A much better solution is a large rabbit water bottle mounted on the side of the cage.
These bottles offer several advantages:
Water stays clean
Bedding cannot enter the bottle
Chicks cannot defecate in the water
Refilling is easy
The bottle can be suspended so the drinking nozzle sits just above chick head height. As they grow, the bottle can be raised slightly.
Many breeders find this system far cleaner and far less work than constantly cleaning bell drinkers.
Temperature Management for Chicks
Temperature control is essential during the brooding period.
Newly hatched chicks require a brooder temperature of approximately 35°C (95°F) during the first few days.
From there, the temperature should gradually decrease.
A typical schedule might look like this:
Week 1: about 35°C
Week 2: about 32°C
Week 3: about 29°C
Week 4: about 26°C
Week 5: about 23°C
By around five weeks of age, most chicks are fully feathered and can come off artificial heat completely, depending on the surrounding environment.
Watching Chick Behaviour
Thermometers are helpful, but chick behaviour is often the best indicator.
If chicks are:
Huddled tightly together, they are too cold.
Spread far away from the heat source, they are too hot.
Moving around calmly and evenly, the temperature is likely correct.
Adjust the heat source accordingly.
Cleanliness and Brooder Maintenance
Clean brooders produce healthier chicks.
Basic maintenance includes
Replacing soiled bedding regularly
Washing drinkers frequently
Removing spilled feed
Checking equipment daily
Good ventilation is also important, but avoid direct drafts on the chicks.
Telling the Difference Between Male and Female Chicks
One of the most common questions poultry keepers ask is how to determine the sex of young chicks.
The internet is full of suggestions, including wing feather patterns, behaviour differences, and various other “old wives’ tales.” Many of these methods are unreliable unless applied to very specific breeds.
A far more dependable early indicator is comb growth.
Comb Development
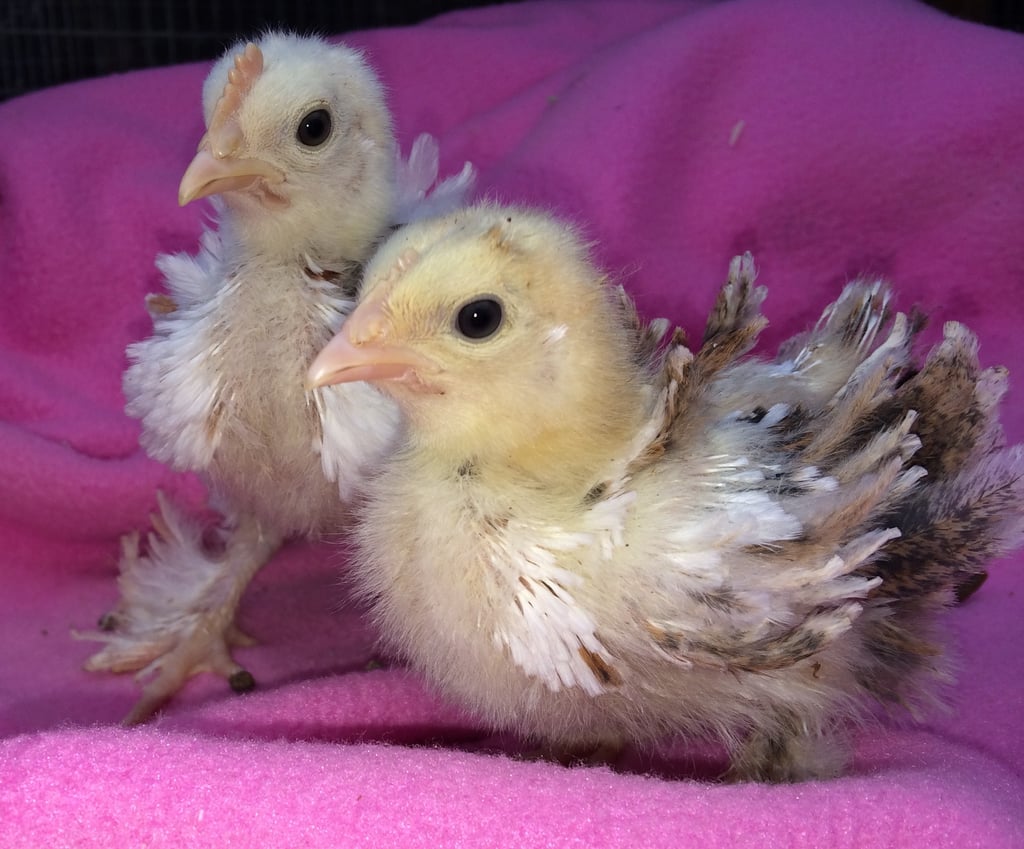
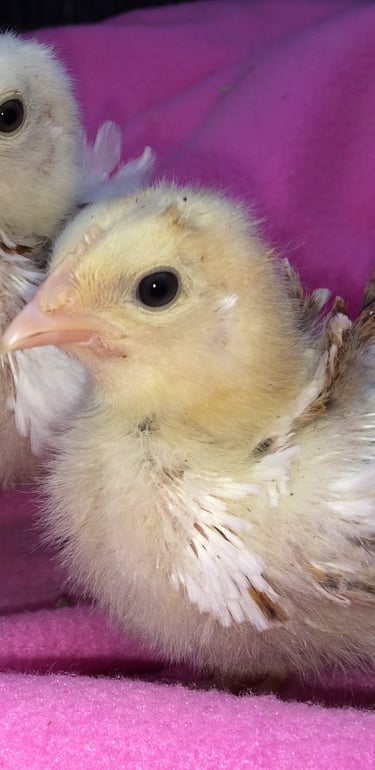
In many chicken breeds, male chicks develop combs earlier and more prominently than females. See the photo at the bottom of the page that shows a male pekin chick at the back and a female at the front of the photo
Signs of a young cockerel often include:
A comb that becomes larger earlier
The comb turning pink or red sooner
Faster overall head development
Male chicks often feather more slowly than the girls
The boys are also often much bolder than the girls, rushing up to your hand as if to challenge you
Female chicks generally have
Smaller combs
Pale comb colour for longer
Slower comb growth
Female chicks often feather up faster than the boys
By around three to four weeks of age, these differences often become noticeable.
While these methods are not perfect for every breed, it is generally more reliable than many of the myths found online.
Methods That Are Often Unreliable
Some commonly suggested techniques are inconsistent or breed-specific, including:
Wing feather length tests
Wing shape
Behaviour differences
Holding the chick upside down
Observing “dominance”
Magnet sexer tools
Vent sexing
These approaches may occasionally work in certain lines but should not be relied upon universally.
Final Thoughts
Raising chicks successfully during their first five weeks requires careful preparation and attention to detail. The key elements are warmth, cleanliness, and practical equipment.
Using a suitable brooder cage, raising feeders to prevent bedding contamination, and choosing clean water systems such as suspended rabbit bottles can make daily care much easier.
Heat sources must be chosen with safety and efficiency in mind. Electric hens are economical and safe for many chick brooders, while quail chicks often thrive better under a small red heat lamp.
By gradually reducing temperature each week and monitoring chick behaviour, you can ensure the young birds develop properly and become strong, healthy adults.
Finally, when trying to determine whether your chicks are male or female, focusing on comb growth is often far more useful than relying on myths or outdated advice.
With the right setup and attentive care, the journey from egg to freshly hatched chick and to thriving young bird can be both successful and deeply rewarding and you will develop a strong bond far superior to any other method of obtaining your pets. It is a fantastic learning experience for children and adults alike.